How to Upload a Single Picture From Adobe Album
When it comes to editing photos on your iPhone, y'all have a lot of choices. Lightroom is arguably i of the almost powerful editing tools available for iOS users, providing many of the aforementioned tools equally the premium desktop version of the software. This Lightroom tutorial volition help you take advantage of Lightroom presets, too as pro editing tools on your iPhone.
How to apply Lightroom for iOS
Lightroom for iOS is an amazing tool for photographers. It is useful for beginners but also includes pro editing tools for advanced users. Many of these premium features are free to use, but like any high-level software, an upgrade allows you lot to use even more advanced-level tools like editing RAW images, batch-editing multiple photos, and making selective adjustments to your photos.
The Adobe Artistic Cloud Photography Plan includes both Lightroom and Photoshop CC for desktop, Lightroom for mobile and spider web, and twenty GB of cloud-based storage for $9.99 a month. You can besides upgrade to 1 TB of storage for $nineteen.99 a calendar month.

How to upload photos to Lightroom iOS and organize them
Uploading and organizing your photos in Lightroom iOS couldn't be easier. Hither's how to add new photos from your Camera Roll to your Lightroom Library:
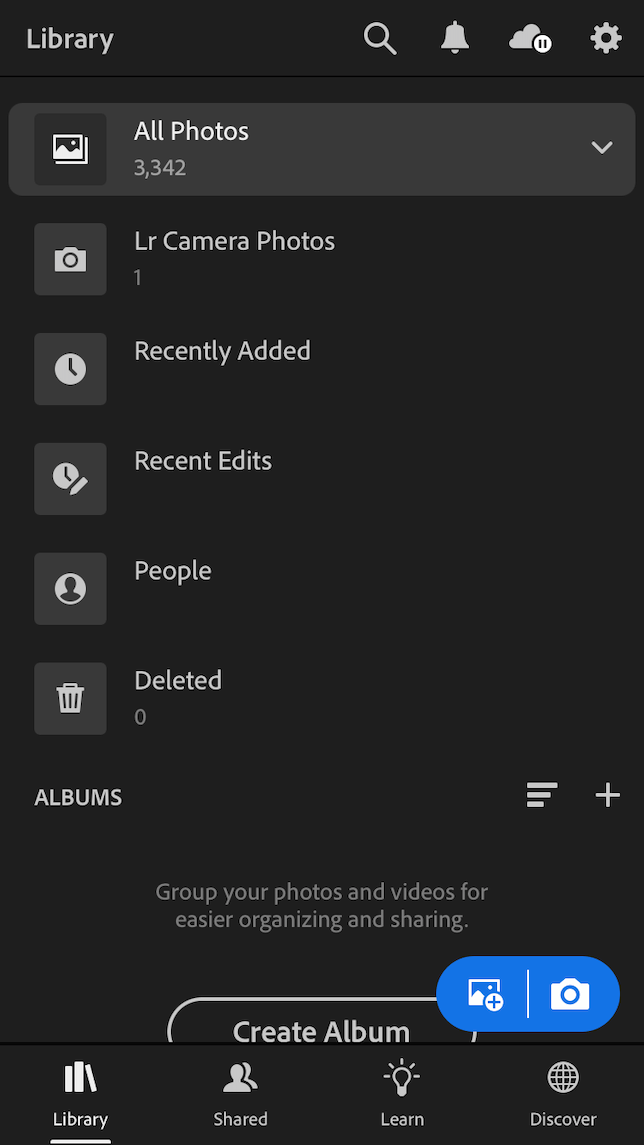
- When you open the Lightroom app on your iPhone, y'all will automatically be taken to your Lightroom photograph library.
- If you take previously added photos or are syncing photos automatically from Creative Cloud (premium subscription), you volition see them here.
- If not, tap the Add Photos icon in blueish at the bottom of your screen.
- Choose From Camera Roll.
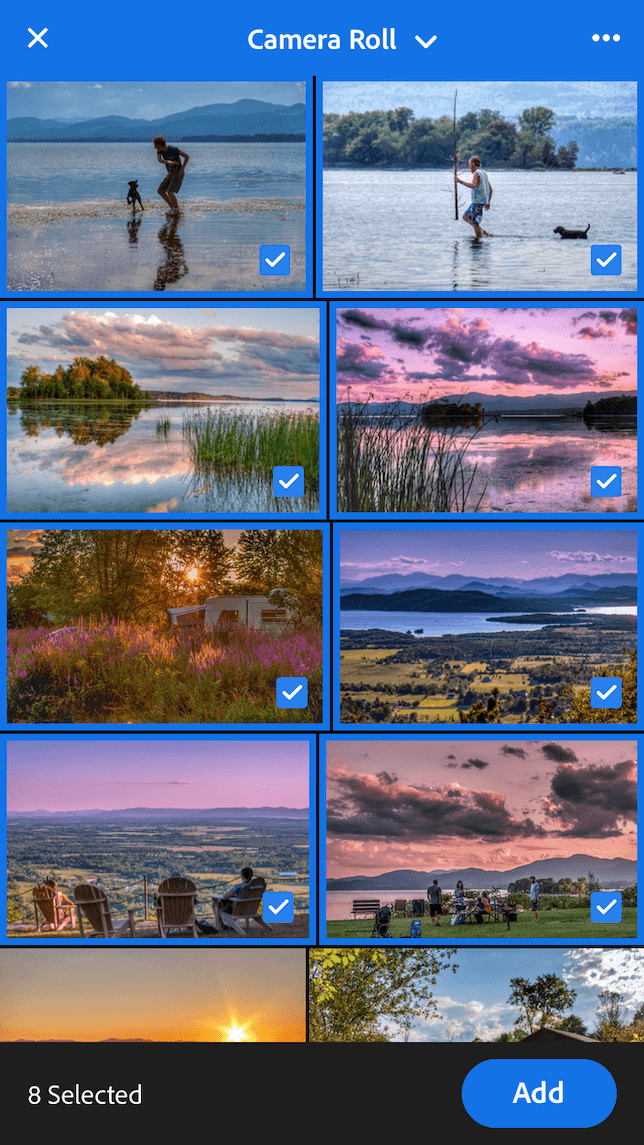
- Swipe the photos that y'all would like to add together to Lightroom and so tap Add.
In one case yous have added your photos to your Lightroom library, you lot can farther organize them into albums:
- Tap Create Album.
- Give your new album a proper name and tap Okay.
- To add photos to your new album, tap on the anthology and choose the Add together Photos icon.
- Y'all will run across a bill of fare where you can cull photos to add to your album (from All Photos, which is your Lightroom library, from Photographic camera Roll, or from Files).
- Once you take chosen a location, select the photos that you want to add to your new album and tap Add.
Lightroom presets tutorial
Have you tried using Lightroom presets on your photos? Presets are basically editing "recipes" that utilize step-by-step processing without requiring you to brand all the changes individually. You tin can purchase Lightroom presets from many of your favorite photographers to emulate their style, or you can create your own Lightroom presets. However you lot cull to practice this, Lightroom presets are fun to experiment with, and they assistance streamline your editing workflow.
How to get Lightroom presets on the iPhone app
There are a few different types of Lightroom preset file types: DNG, XMP, and ltrtemplate. The installation process may vary depending on file blazon, then jump to the instructions below that are relevant to the files you are installing.
A quick heads up: It is far easier to install DNG files on your phone by showtime unzipping them on your desktop calculator. And if yous are installing XMP files, using Lightroom CC or Lightroom Archetype CC on your desktop is mandatory.
How to add a DNG preset file to Lightroom
To add together DNG files to your Lightroom mobile app:
- Download your complimentary or purchased presets equally a zipped file to your desktop computer.
- Click on the file to unzip it.
- Upload the file to your favorite cloud storage service, such as Dropbox, iCloud, or Google Drive.
- On your iPhone, open your cloud storage app and save your presets to your iPhone. The process volition vary slightly depending on which cloud storage service yous are using.
- Open Lightroom and tap Create Anthology.
- Requite your album a proper name and tap on the Add Photos icon in blueish.
- Depending on your deject storage service, you lot volition be prompted to choose From Photographic camera Roll or From Files to add your presets to your album.
- Select the DNG presets to add them to your album.
- Tap 1 of your new presets, then tap the three dots in the upper right.
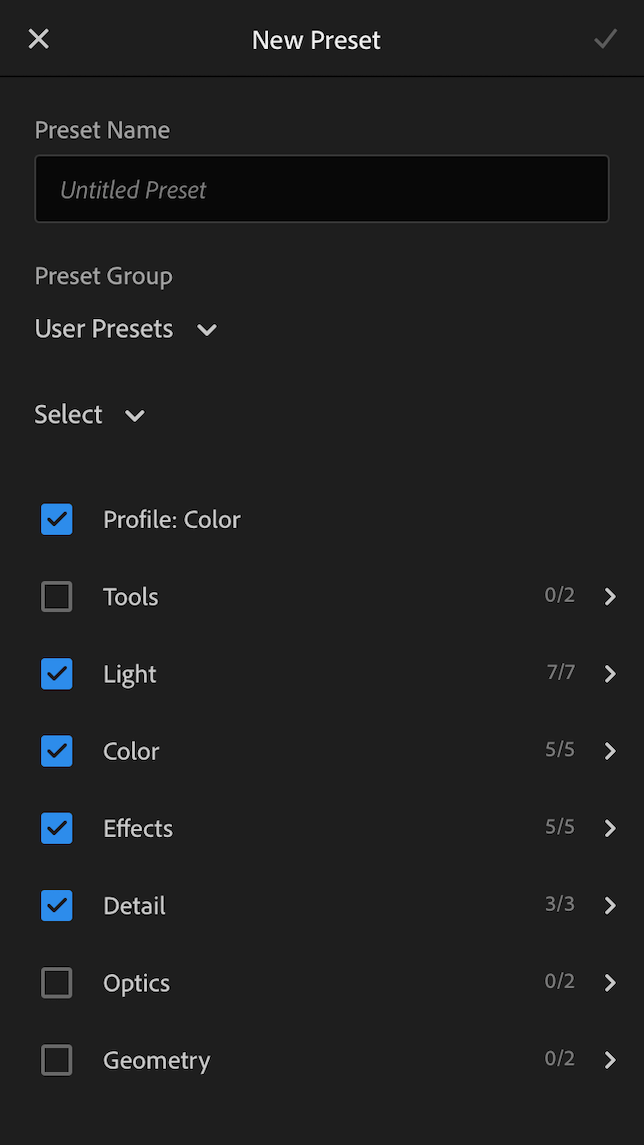
- Choose Create Preset.
- Give your preset a name and tap the checkmark to relieve it for futurity employ.
How to add XMP or ltrtemplate preset files to Lightroom
Yous will need a subscription to Lightroom for desktop in order to import XMP or ltrtemplate files to Lightroom iOS. You tin can then follow these instructions:
- Download the preset files and open Lightroom Classic CC.
- Navigate to the Develop mode.
- Click on the + next to the word Presets in the left sidebar.
- Click on Import Presets, and so navigate to the files on your computer and import them.
- Go to whatsoever photograph in your Lightroom library and click on the chosen preset to apply it to your photograph.
- Now you will need to sync your files to your Lightroom Mobile app. Start by adding all your presets to a folder and dragging them to the Collections section on the left sidebar.
- Make sure the Sync icon is enabled next to your new preset folder.
- Open Lightroom on your iPhone and go to the newly synced folder.
- Tap ane of your new presets.
- Choose one of your new presets, then tap the iii dots in the upper correct.
- Tap Create Preset.
- Give your preset a name and tap the checkmark to save information technology for futurity use.
How to use Lightroom presets on your own photos
After you've imported your new Lightroom presets, you'll probable be anxious to endeavor them out. Hither's how to use them to your own photos:
- Import the photograph yous want to piece of work on into Lightroom.
- Gyre through the editing icons at the bottom of the screen and tap Presets.
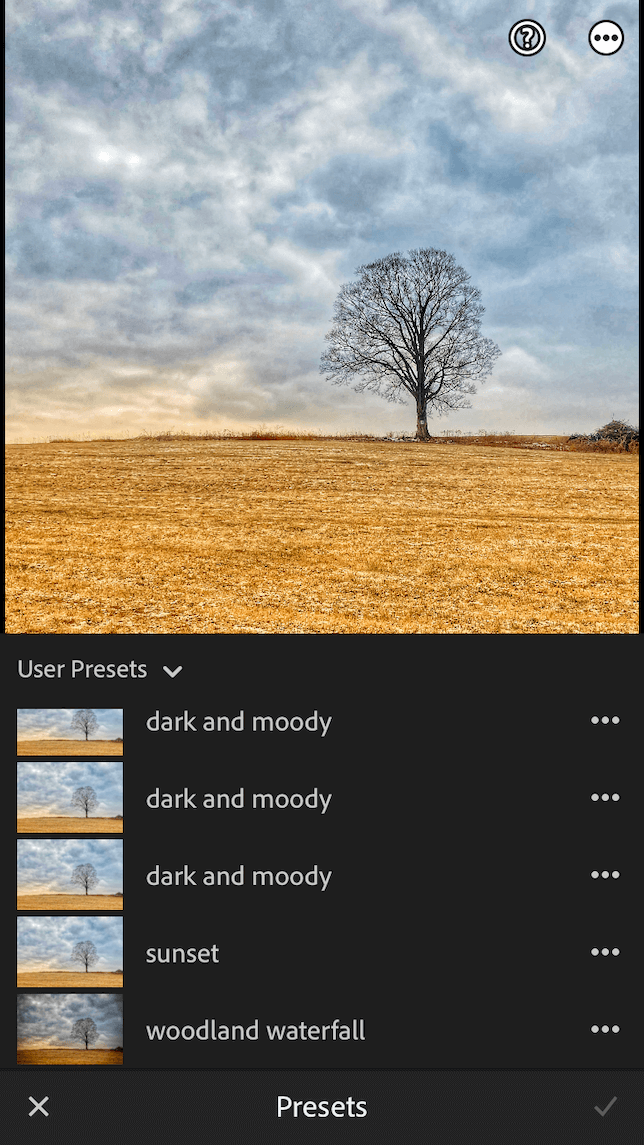
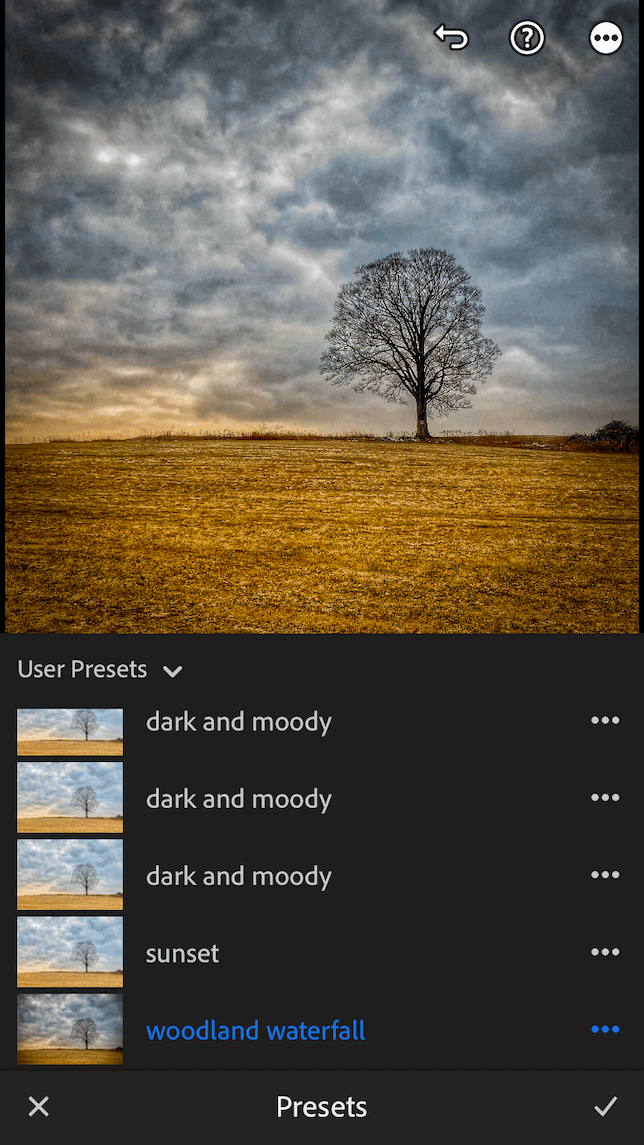
- If you want to utilise presets you've imported, tap User Presets.
- A menu of all your imported and created presets volition appear. Simply choose the ane you lot want to apply to your photo.
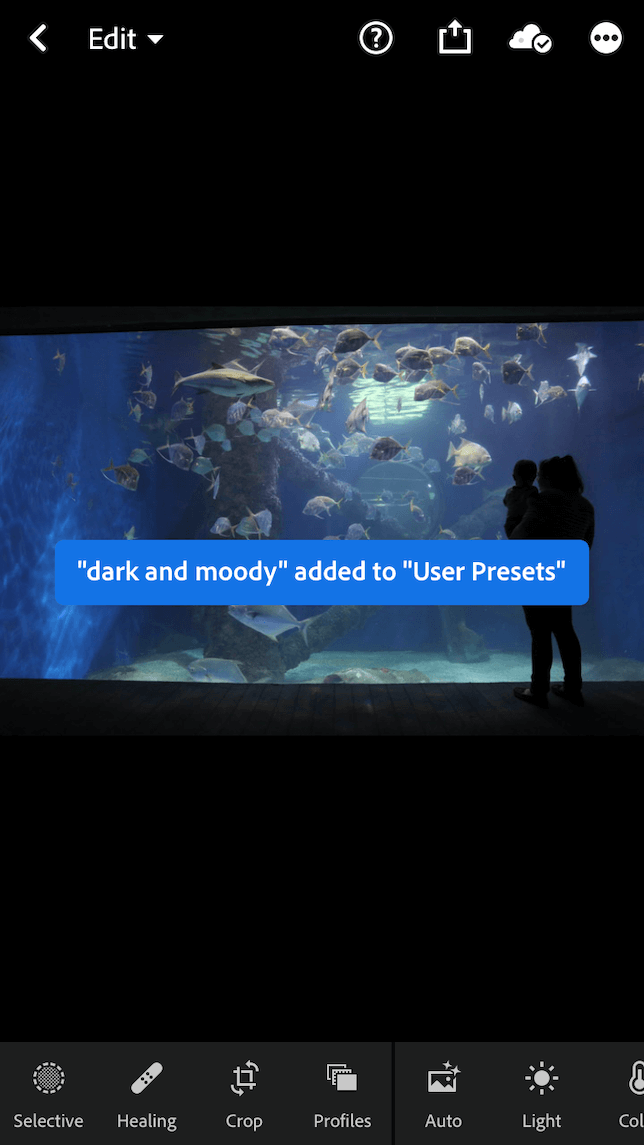
- Tap the checkmark in the lesser-right corner.
- Tap the share icon to salvage the photograph to your Camera Roll.
How to apply a preset to multiple photos at one time
Did you know you can employ presets — or whatsoever editing you lot've done to an individual photograph — to every bit many other photos as you desire? This process is called "batch editing," and it makes your workflow so much easier! Here's how to utilize presets to multiple photos at one time:
- Edit a single photo using a preset, in addition to whatsoever additional adjustments.
- Tap the three dots in the upper corner and cull Re-create Settings.
- Now, go dorsum to your Lightroom photo library and long-press all the photos you want to employ these settings to.
- Tap Paste at the lesser of the screen, then tap Apply.
- From here, yous tin brand any additional adjustments as desired.
How to tone down a Lightroom preset
Wouldn't it exist lovely if at that place were a unmarried slider to tone down a preset that you've applied to your photo? Unfortunately, there isn't. But the expert news is that you can tap on whatever of the editing icons to encounter what enhancements were made equally office of the preset. Afterwards that, you can make adjustments using sliders until you are happy with the results.
How to make your own preset in Lightroom
Whether y'all're starting from scratch or tweaking a preset you've already imported, you can easily create new presets from edits y'all've made to private photos. In fact, creating presets becomes addictive once you lot get started. Here'south how to make your own preset in Lightroom mobile:
- Open a photo in Lightroom mobile.
- Employ a preset if yous desire to use it every bit a jumping-off point, or use the editing sliders until yous achieve the look yous're going for.
- Tap the iii dots in the upper-right corner.
- Select Create Preset.
- Requite your preset a proper noun and tap the checkmark.
- Your new preset will be available under User Presets when you are ready to utilize it.
Now that you take some basic editing skills under your belt, let'due south take a await at some of the more avant-garde editing tools in Lightroom iOS. Note that many of these features do require a paid Lightroom subscription or Adobe Photo Programme.
1. How to utilise the Lightroom Camera to shoot in RAW
The power to shoot in the RAW file type and edit RAW photos gives you lot a lot more flexibility for advanced editing. If y'all are sporting an iPhone 12 Pro or later (with iOS 14.3 or after), y'all already have the capability to shoot in RAW. Make sure RAW is your chosen format in your Camera settings for iPhone.
For those using older iPhone models, you can still shoot in RAW past using the Lightroom Camera app. Lightroom's RAW format is called DNG (Digital Negative). Here's how to use the Lightroom Camera to shoot RAW photos:
- Open the Lightroom app on your iPhone and tap the camera icon at the lesser of the screen.
- You will see the file format at the top of the screen. This volition appear as either DNG, which is Adobe'due south RAW format, or JPG. Choose DNG.
- Yous tin also use the Lightroom Photographic camera to change settings that are normally stock-still on your iPhone. The carte du jour above the shutter button allows you to set the exposure bounty, shutter speed, ISO, and white balance.
- In one case you've chosen your settings, take your photos as usual.
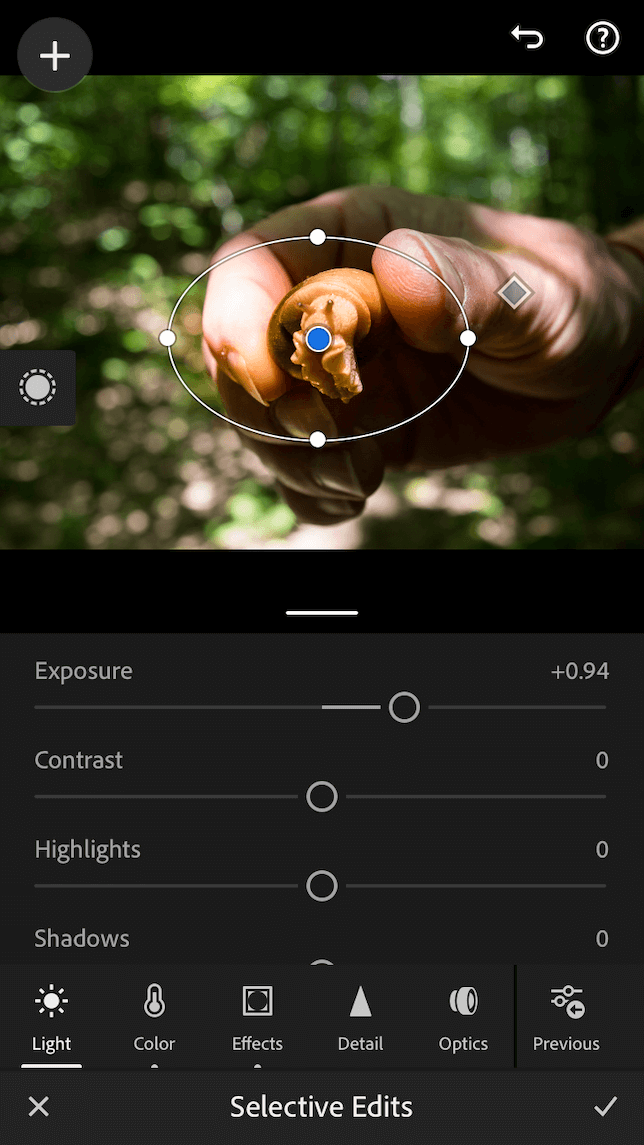
ii. How to make selective adjustments in Lightroom mobile
Using the Selective edit tool, yous tin make edits to just one office of a photo while leaving the residue of it unchanged. This is great for lightening up your subject field'southward face in a portrait or fixing a night corner without altering your whole photograph. Here'south how to brand selective adjustments in Lightroom using either the Brush tool, the Radial Selection tool, or the Linear Selection tool.
- Open the photograph you want to edit in Lightroom.
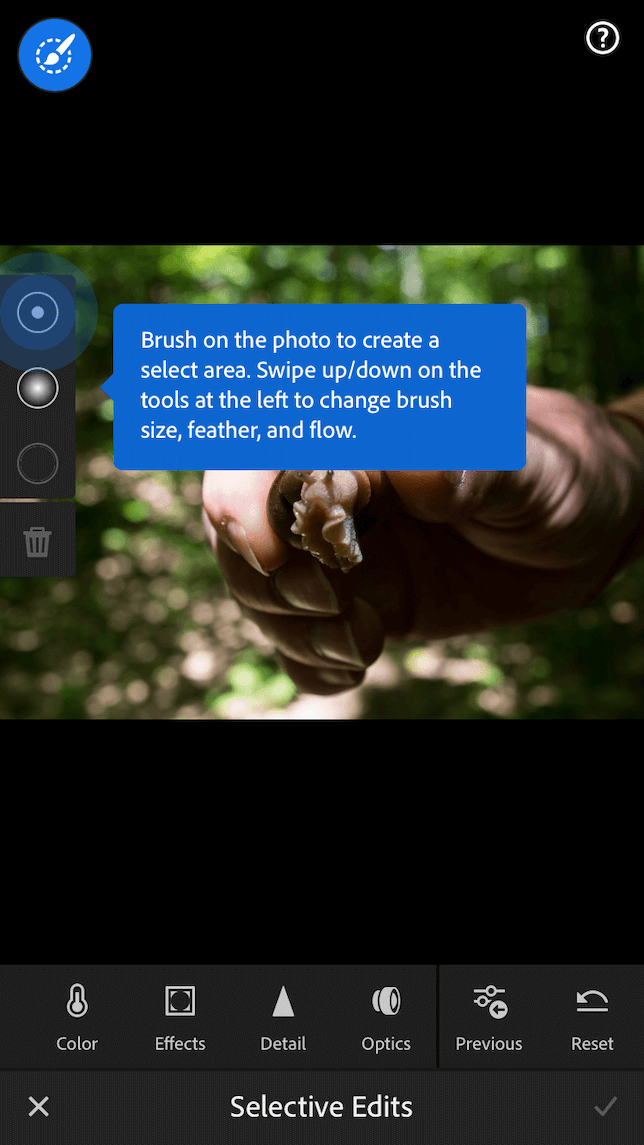
- Choose Selective Edits from the bottom card.
- Tap + and cull the type of selective editor you want to use. The Brush Option tool lets you select specific parts of your photograph by brushing over them and applying edits. The Radial Selection tool lets you choose the shape and dimension of the region y'all want to edit. And the Linear Selection tool lets you lot apply edits gradually across a region of a photo in a straight line, as broad or as narrow every bit yous desire.
- For the Brush Selection tool, use your finger to paint over the area you want to suit. This will color it reddish as you lot are brushing. Now use the editing tools to enhance the area you take chosen.
- With the Radial Pick tool, tap the photo in the spot you want to arrange. A circle volition announced. Utilise your fingers to change the size and dimensions of the circle. Once y'all accept the surface area highlighted, you can employ the editing tools to make adjustments.
- Using the Linear Selection tool, tap the screen until three lines appear. Drag the lines to reposition them. Moving the lines farther apart will create a more gradual aligning. Yous can also change the orientation of the lines by dragging them with your fingers.
- Tap the checkmark when you are finished.
3. How to suit the tonal scale of your photo in Lightroom mobile
The Tone Curve graph represents changes made to the tonal scale of a photo, and the tonal scale is the difference between the brightest and darkest parts of your photo. On this calibration, the horizontal centrality represents the original tone values, with blackness on the left and moving progressively lighter to the right. The vertical axis represents the changed tone values, with black on the bottom and progressing to white on top. Here's how to utilise the Tone Curve tool to make tonal adjustments to your photo:
- Open the photograph you lot want to edit in Lightroom.
- Tap the Light icon and and so select Bend.
- Choose the multi-colored circumvolve to adjust the tonal range in all colors, or cull a specific color to make adjustments to that color range.
- Tap the line and elevate it upward or downwardly to adjust the tonal calibration. The darks and lights in your image are mainly adjusted in the middle region of the curve. Highlights and shadows are adjusted at the ends of the line. Every bit you drag the line upwards, you are increasing the lite and/or highlights. As you lot drag the line downward, you are decreasing brightness and/or increasing shadows.
- Play around with the Tonal Bend adjustments until yous experience comfortable. The curved arrow at the top of the screen will undo any changes you've made.
- When you are finished adjusting the tonal scale, tap Done.
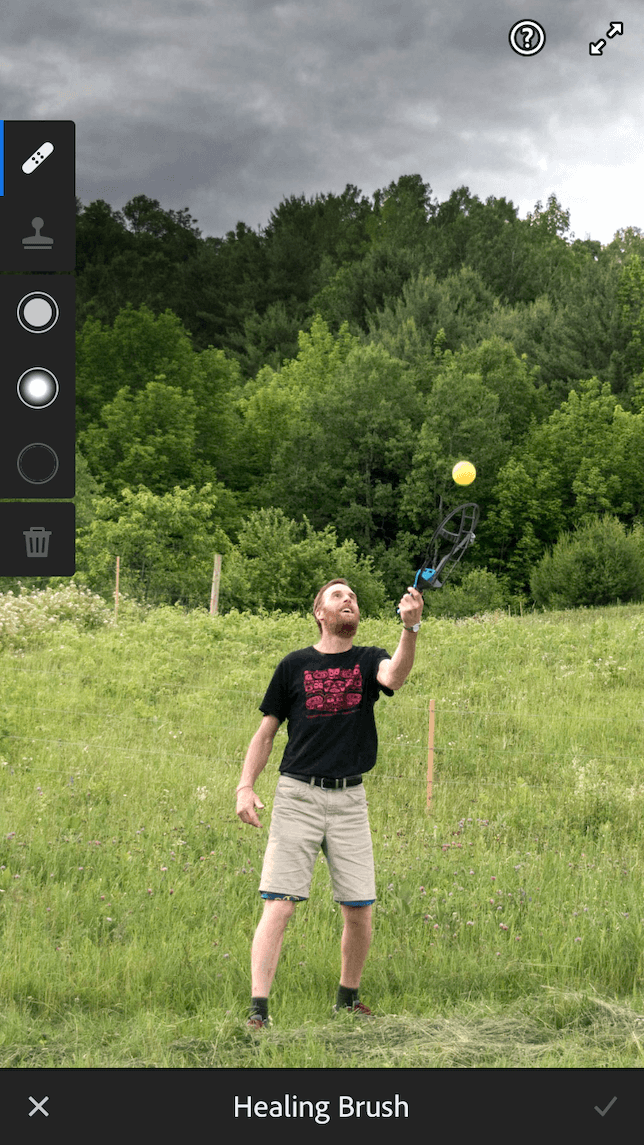
4. How to remove an unwanted object in Lightroom mobile
Y'all thought you had the perfect selfie — merely who's that stray photograph bomber in the background? Fortunately, y'all may be able to salvage your shot with Lightroom mobile's Healing tool, which can remove objects from photos. Hither'southward how to do it:
- Open the photograph yous want to edit in Lightroom.
- Tap Healing.
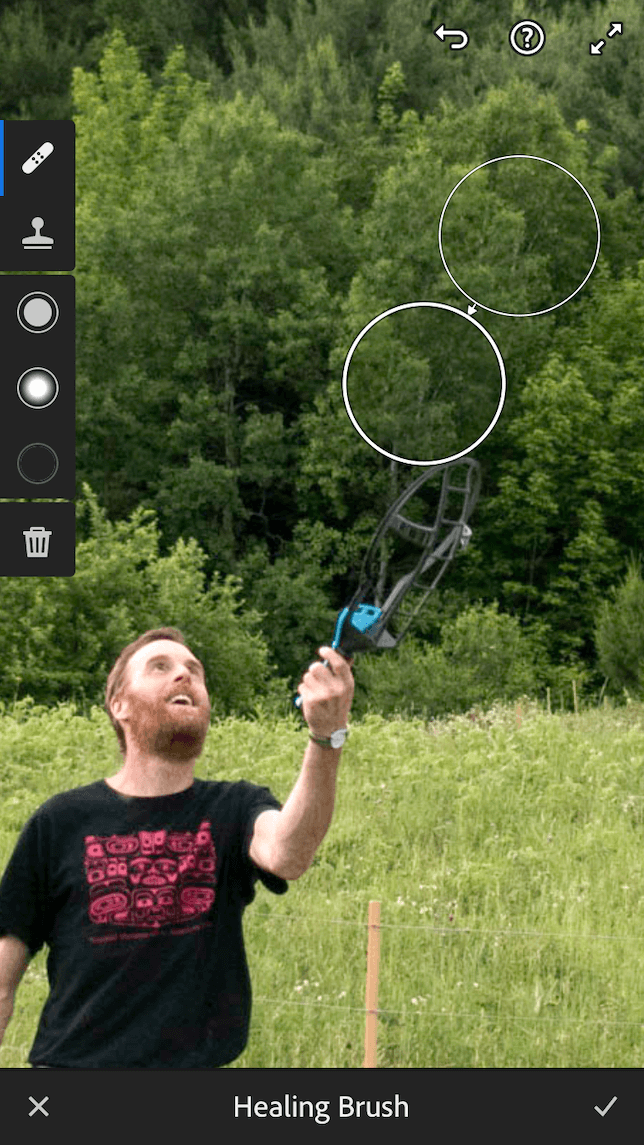
- Pinch your fingers outward across your photo to zoom in on the object you want to remove.
- Tap on the object you lot want to remove. (You can use swipe on the aligning circles to change the size of the area you're removing, besides equally the opacity and feathering.)
- The object will be removed, and the Healing tool will use pixels from the surrounding areas to assist the spot blend in.
- Tap the checkmark when you are finished.
The all-time way to use Lightroom is to experiment with it using the tools we've mentioned. Simply follow the communication in this Lightroom tutorial, and call up that no mistake is irreversible. Each new error teaches a valuable lesson. And before you know it, you'll be a pro at editing your photos with Lightroom mobile.
lancasteryoughlythers.blogspot.com
Source: https://backlightblog.com/lightroom-tutorial
0 Response to "How to Upload a Single Picture From Adobe Album"
Post a Comment